DIY workbench and tool organization
I have a corner of the garage that is the only space available for a workbench and tool organization, so having the workbench be mobile as well as have multiple purposes and storage is a must.
Here’s the before!
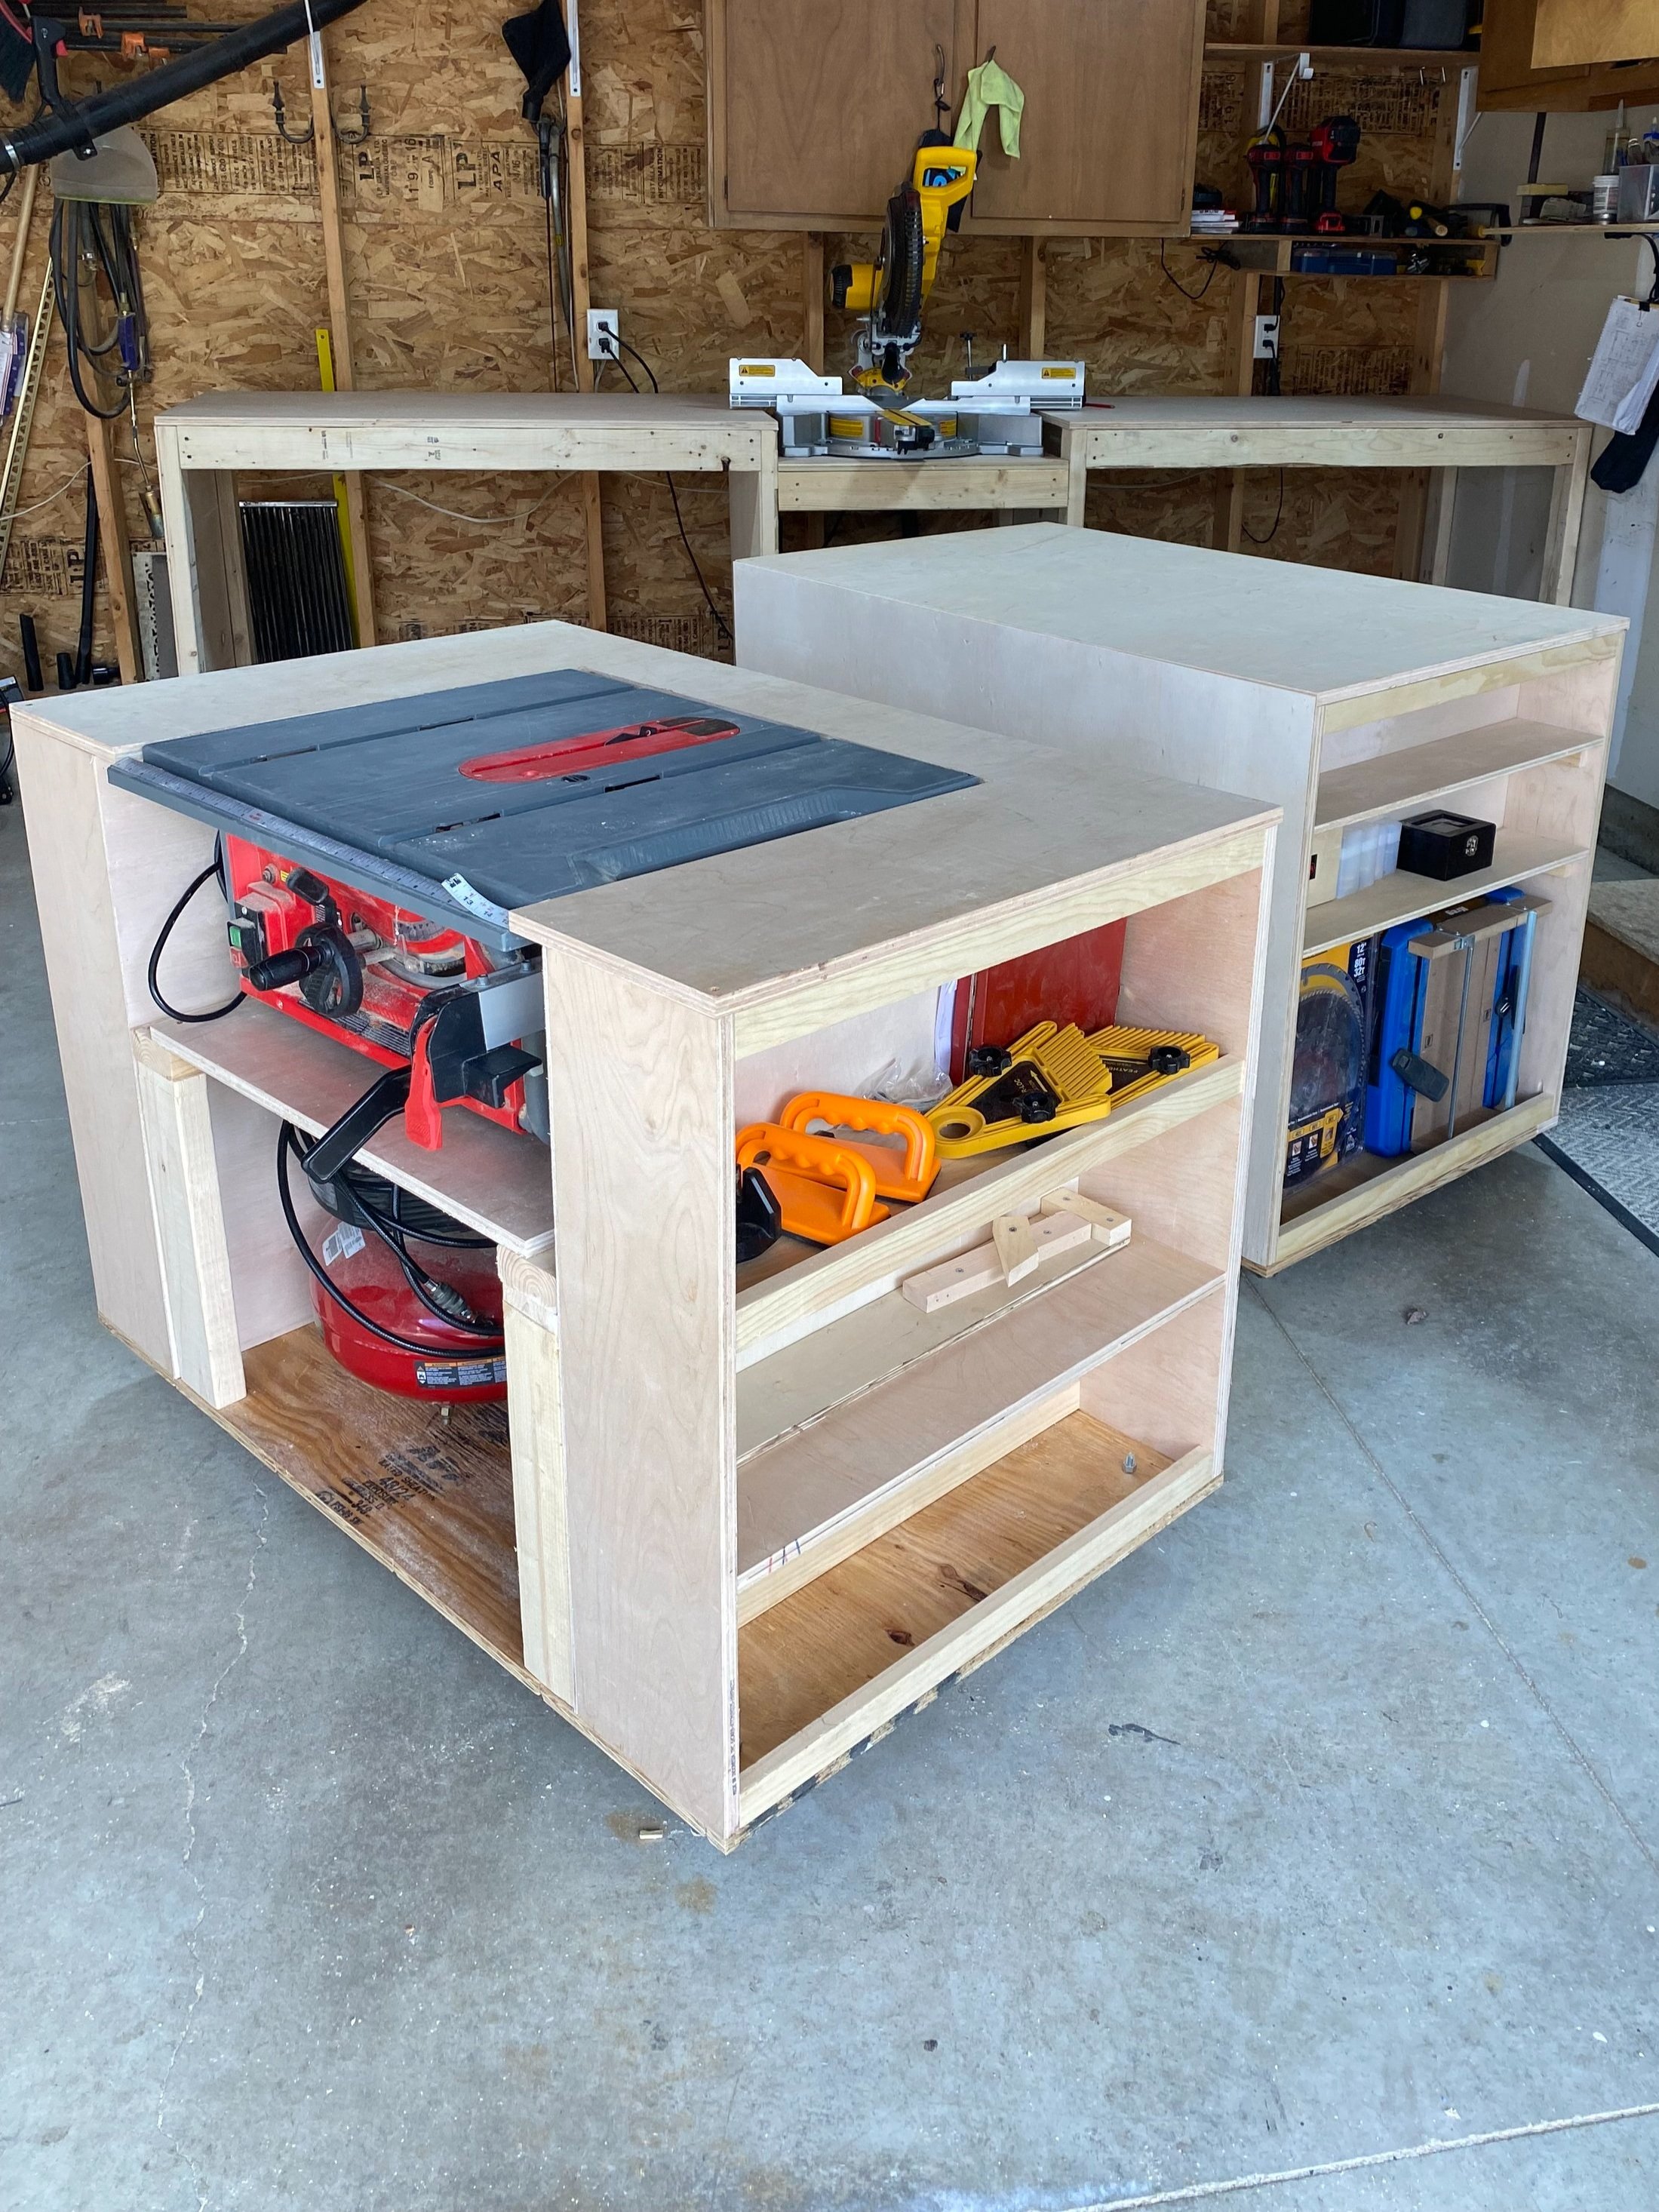
I found this tutorial from Ana White Ultimate Roll Away Workbench with Miter Saw Stand which I used and modified to fit my needs and the materials I already had. This features a miter saw stand with mobile benches that fit right underneath when not needed.
My favorite part is the table saw stand that’s inset and is the same height as the other mobile workbench so I now have an out feed table or extension wing for my table saw when needed.
The storage is a huge bonus to these workbenches as well, the table with the table saw has room for open shelving on each side for additional tool storage. On the other table I customized to have storage on only one side to allow for fitting larger items like a router table.
For tool storage, I built french cleats on the wall behind the miter saw table which is more customizable and steadier in my opinion than a peg wall for tool storage. And bonus you can just make these tool organizers with scrap wood, so no added costs.
To make these you simply make the cleats to width of about 2.5” or more with one edge being at a 45 degree angle which will be pointing up.
When creating the organizers hanging cleats the 45 degree angle would be pointing down allowing for the cleats to hook together. Once weight is added these are nice and sturdy.
Be sure to check back for full garage reveal!


